The ASRock X99 Extreme11 Review: Eighteen SATA Ports with Haswell-E
by Ian Cutress on March 11, 2015 8:00 AM EST- Posted in
- Motherboards
- Storage
- ASRock
- X99
- LGA2011-3
One of the upsides of using a consumer grade motherboard for a prosumer system is the capability of both the BIOS and the features of the software compared to the normal workstation equipment. Normal workstations still use a dull black/white on blue BIOS implementation with no interactivity and mindless lists of features. With motherboards that come from the commercial lines of the major motherboard manufacturers, they bundle in both functionality and user experience, recognising that while the main user might not be interested, the local admin might need to go in sometime.
ASRock's X99 BIOS uses enhanced visuals, as well as a nicely laid out options list. It certainly beats the old style for sure, with the help system giving information when required. The goal here is to get motherboard manufacturers to increase the interactivity of such an interface, making it akin to software, but that remains difficult. ASRock uses icons and images, but we still have a fixed width font as well as merely selecting options. My hope is that this evolves - we live in the future after all.
Much of the detail of the ASRock X99 BIOS is similar to that of our previous ASRock X99 Motherboards. As a result we have copied the description and included it here for clarity, updated on note for the Extreme11 specific options.
ASRock X99 Extreme11 BIOS
The ASRock BIOS shifted slightly between Z87 and Z97, and it is the Z97 implementation we get on X99. This means the starry background is gone, replaced with a dark and blue-crystalline image. The icons are also reduced to mere text with a small image, and unlike the ASUS BIOS the menu sections are of equal size, which I prefer. There is also an adjustment to the OC Tweaker layout, which we will come to.
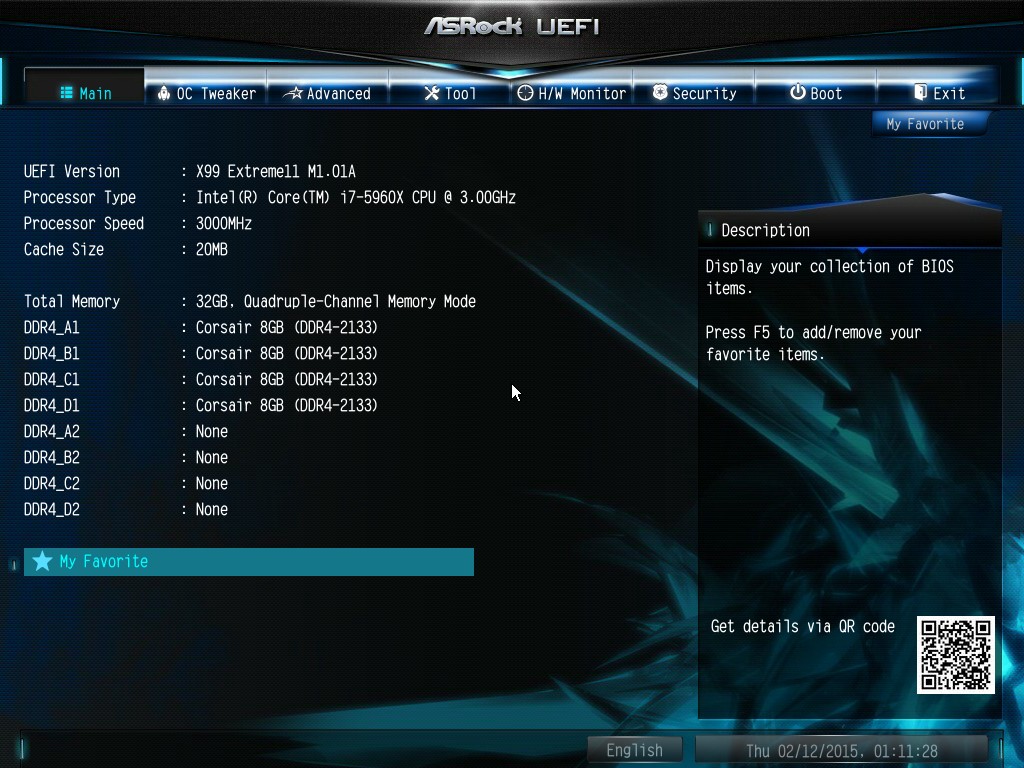
There is no ‘Easy Mode’ for the ASRock BIOS, with entry direct into this first Main screen. The right hand side of the BIOS is for description of the option selected, and the main segment shows information such as the BIOS version, CPU installed, CPU speed and memory installed. As mentioned in previous reviews, having some set of information relating to CPU voltages, temperatures and fan speeds might be useful here. If ASRock was to do an Easy Mode, it would make sense to have a one-button overclock option as well.
OC Tweaker takes heed of one of my previous complains about the ASRock overclock options. Previously there used to be a long list of options that continuously grew, depending on what options were left open to the user. For X99, ASRock has condensed these options into separate submenus similar in design to those we see on a GIGABYTE motherboard. Note that ASUS and MSI BIOSes currently go half-way between these extremes, offering some basic options with the more advanced ones in separate menus.
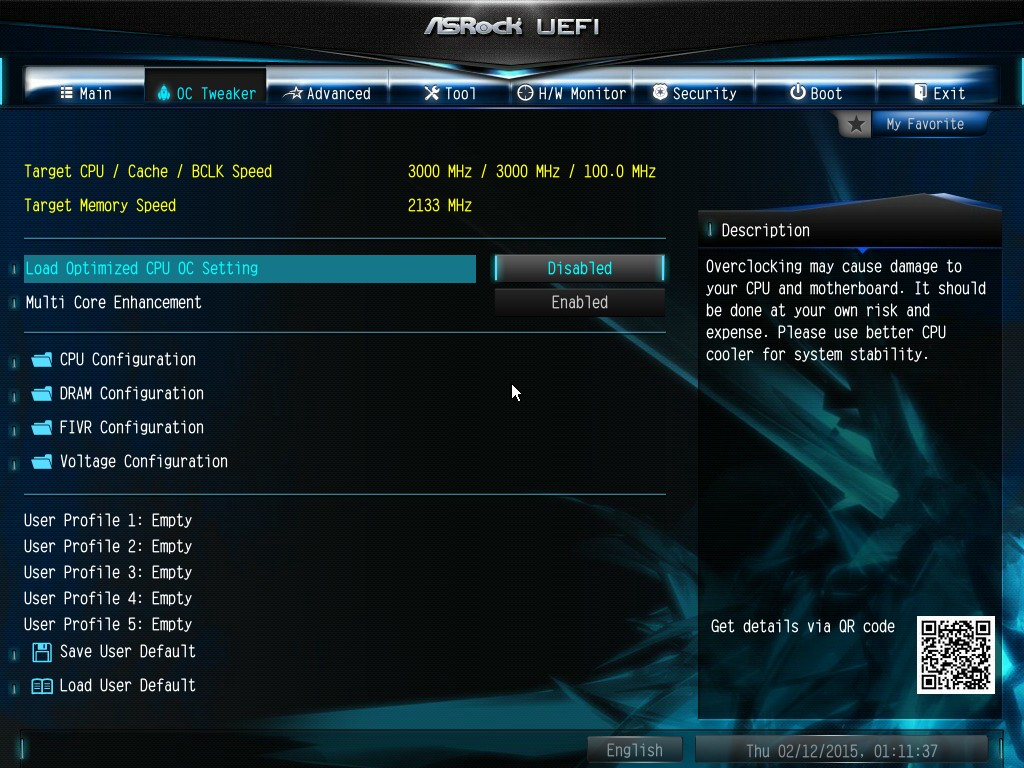
ASRock cuts straight to the chase – the first two options deal with overclocking. We have touched on features like Multi Core Enhancement many times previously, but it is interesting to have it so high up on the list of options. The Optimized CPU OC Setting gives some easy selections for overclocks based on ASRock’s internal testing:

In line with our overclock testing, 4.0 GHz and 4.2 GHz should be achievable by all CPUs, with 4.4 GHz by most and 4.5 GHz by around half, given sufficient cooling methods.
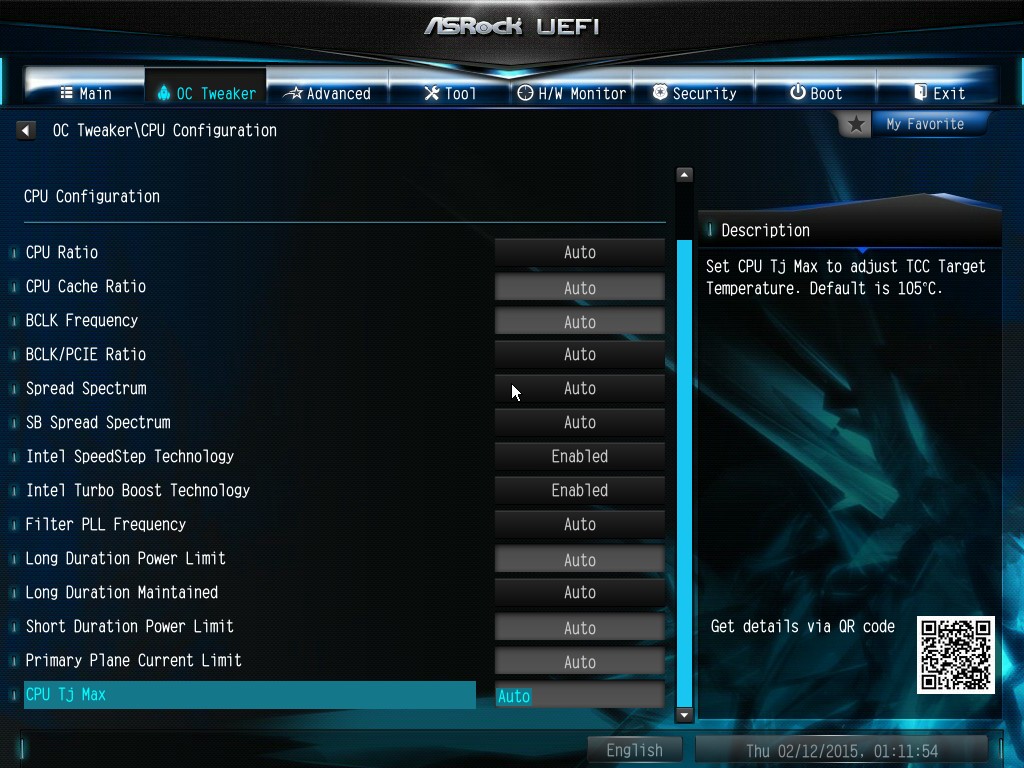
The OC Tweaker menu is split into four sections. CPU Configuration gives options for CPU Ratio, multiplier, frequency, turbo boost and power limits:
DRAM Configuration allows for XMP application, DRAM strap adjustment, DRAM voltage and sub-timing adjustment, all the way through primary timings, secondary timings, tertiaries and others.
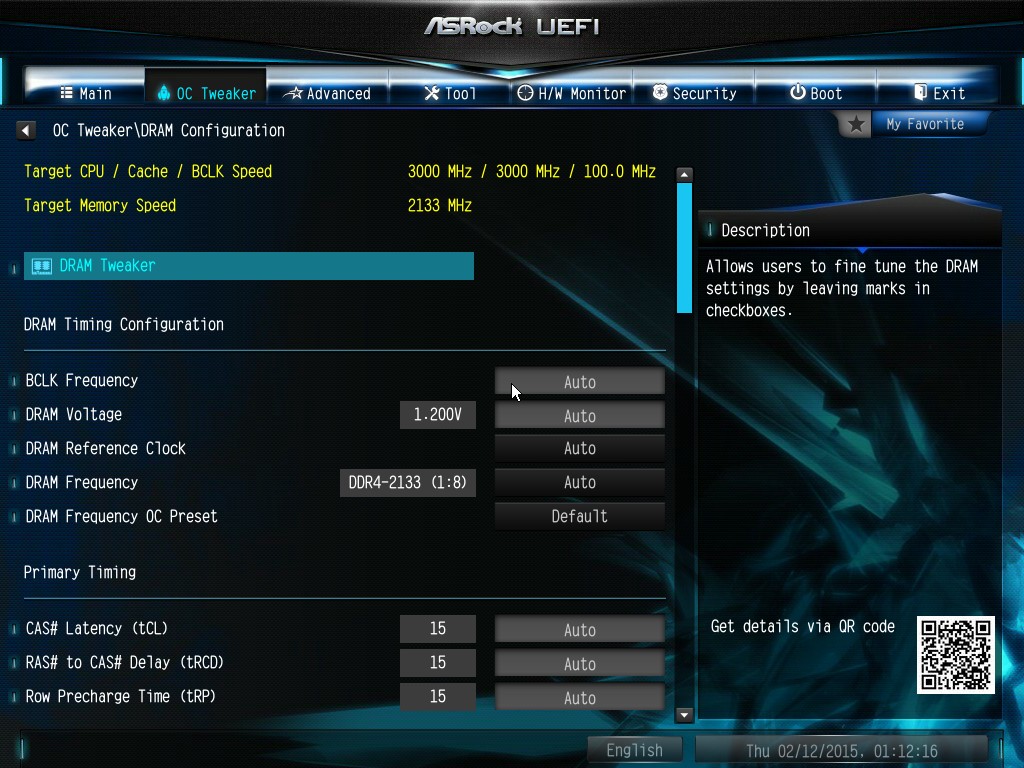
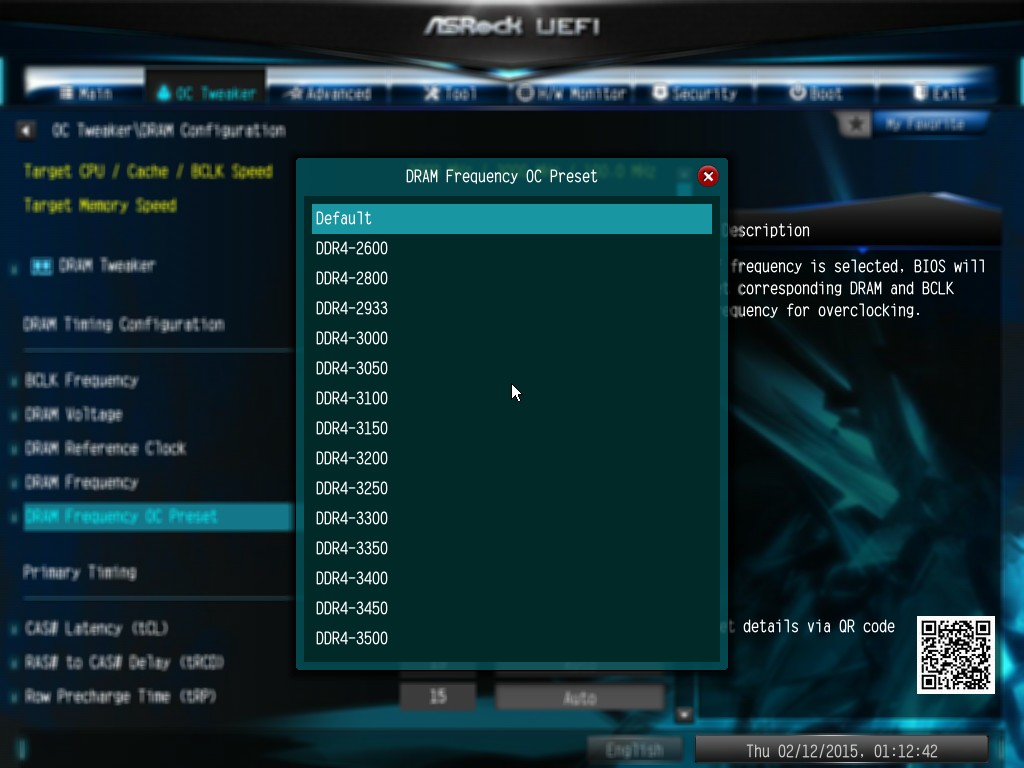
ASRock still uses the DRAM Tweaker function to fine tune the JEDEC and XMP responses to each memory kit. The ASRock BIOS also offers a DRAM Frequency overclocking preset list which will adjust the CPU strap and BCLK frequency needed to achieve various speeds.
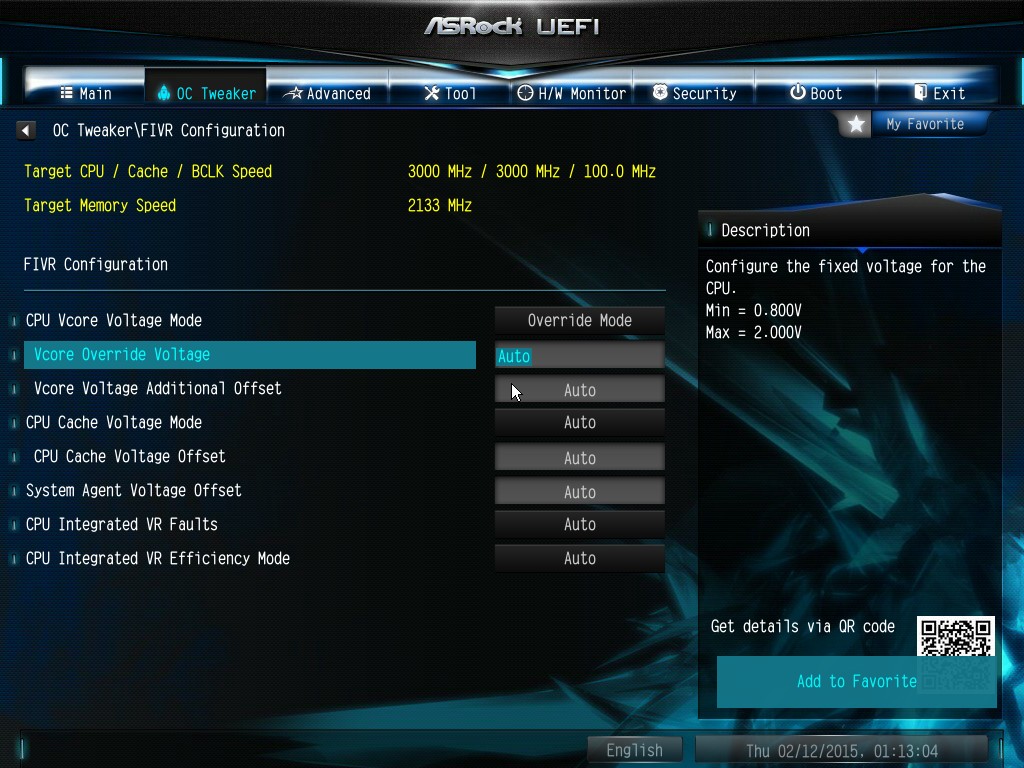
The FIVR Configuration menu from the OC Tweaker page deals primarily with the CPU and CPU Cache/uncore voltages.
The Voltage Configuration menu has the other voltages on the system, including VCIN to the FIVR and load line calibration. The Load Line Calibration option also comes with a handy graph showing what each setting means:
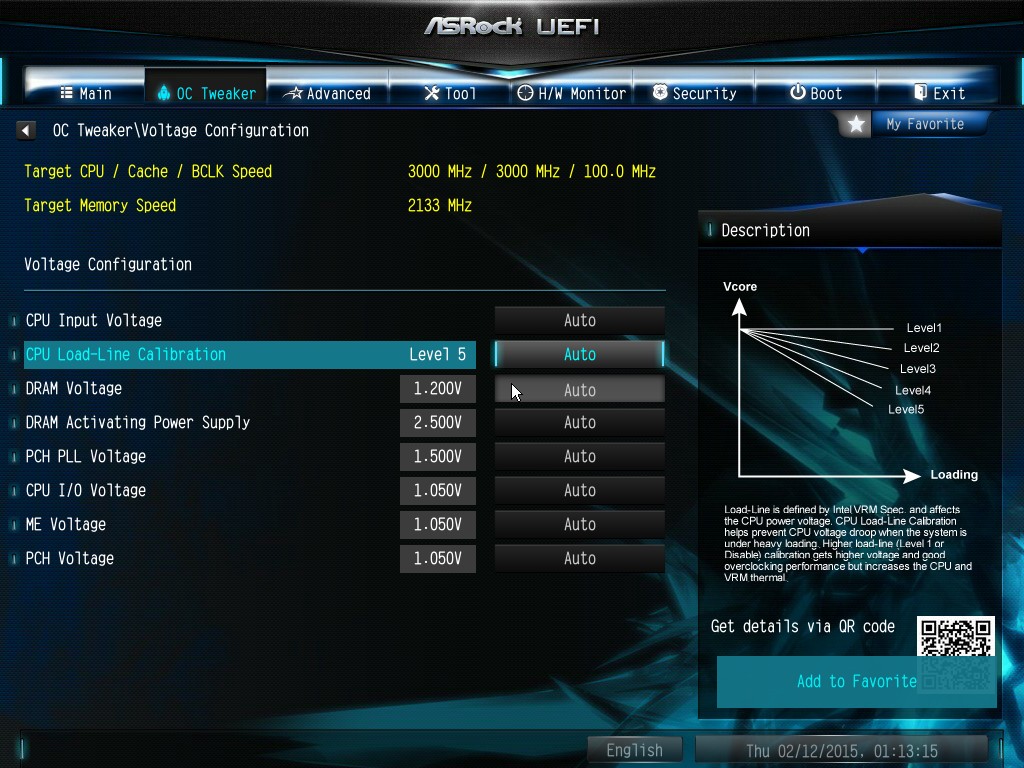
Unfortunately this arrangement of voltages is mildly confusing. Typically an overclocker will adjust the CPU voltage and the Load Line Calibration settings enough to get the right combination, and ASRock has placed these options in two different menus. If the CPU VCore option could be duplicated in the Voltage Configuration menu, this would be preferable.
The Advanced tab deals with other elements of the system configuration, such as the chipset, storage and super IO calibrations. This includes fixing power modes, PCIe linking speeds, disabling or enabling onboard controllers and adjusting RAID configurations.
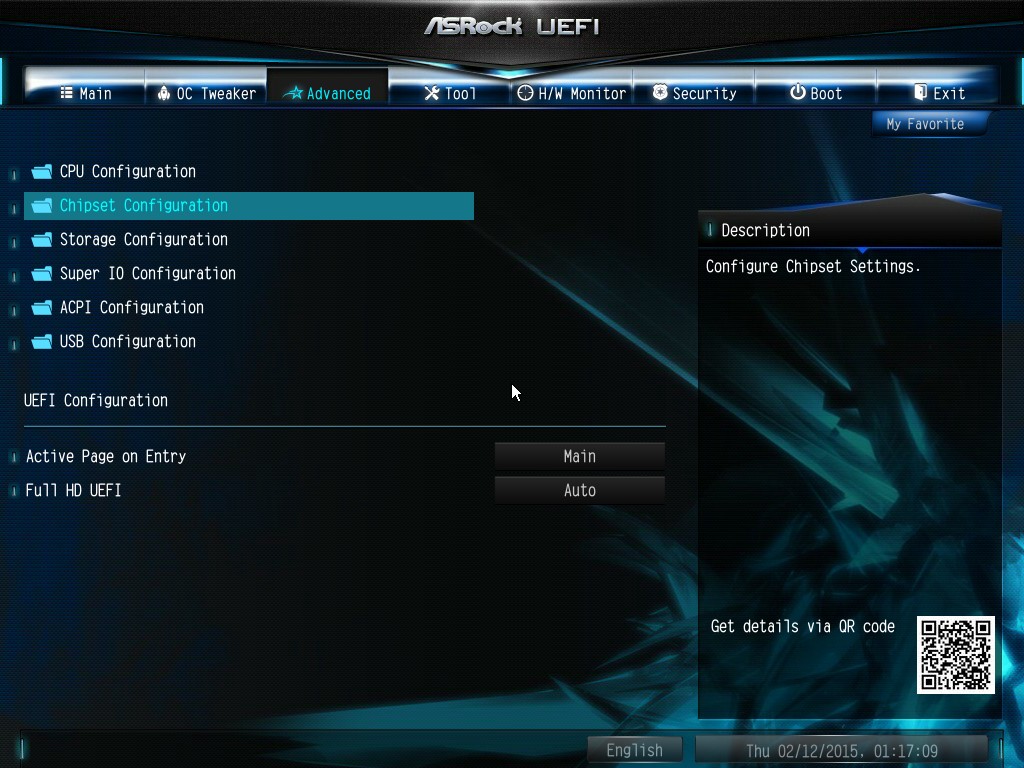
An adjustment to the X99 Extreme11 BIOS is that the Active Page on Entry setting has been moved here.
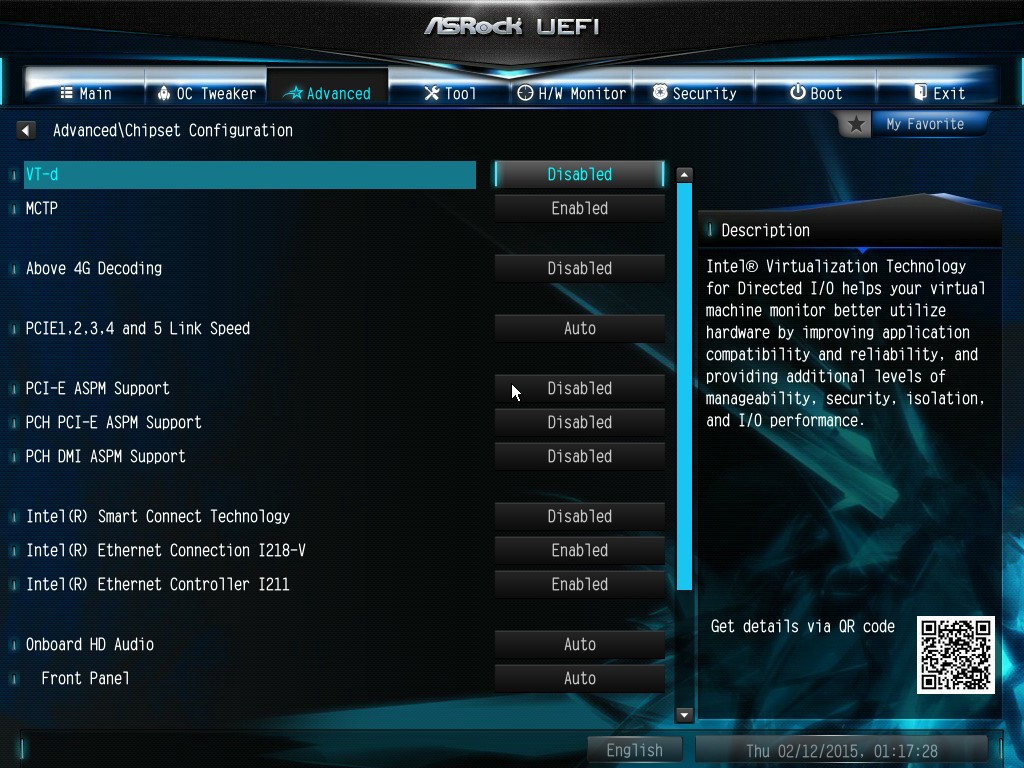
By default the ‘Above 4G Decoding’ inside the Chipset Configuration menu is disabled, for users that want PCIe coprocessors that require this feature.
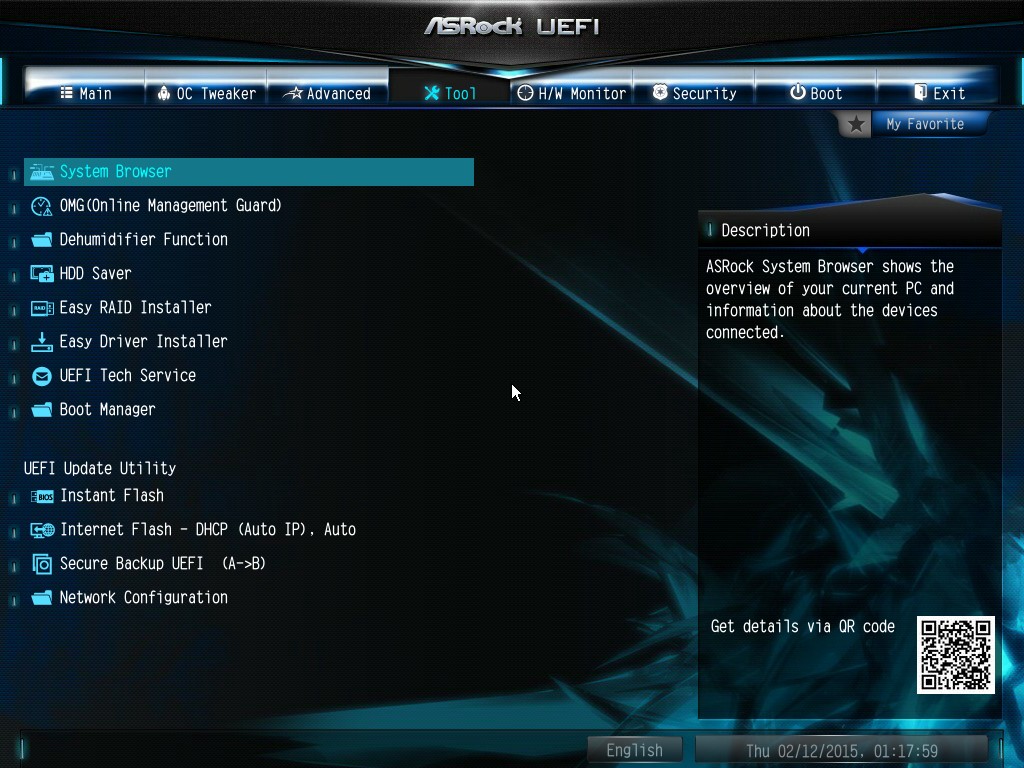
The Tools menu is typically where ASRock tries out its more unusual ideas, although we do not get anything new for X99 that we have not seen on Z97 already. The System Browser shows the different elements of the motherboard and what is detected:

The Online Management Guard (OMG) allows the user to enable or disable the network ports at various times of the day, as determined by the system time:
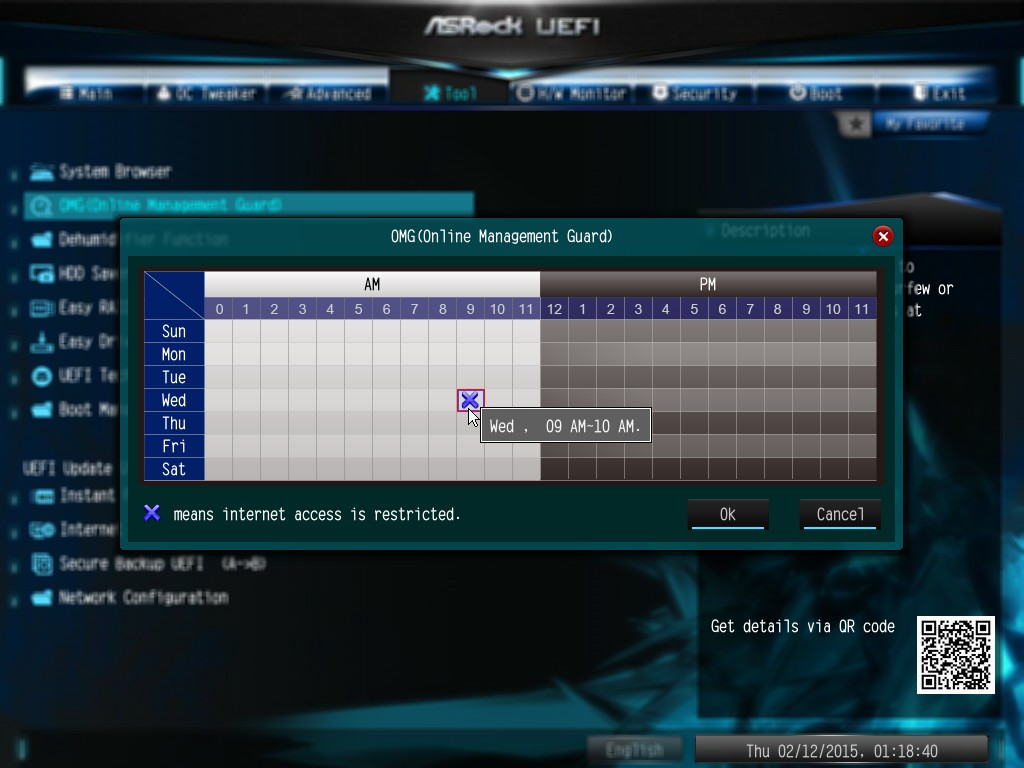
(It is amusing that this feature is aimed more at controlling when a child is allowed online, but X99 is not exactly a system configuration used as secondary machines.)
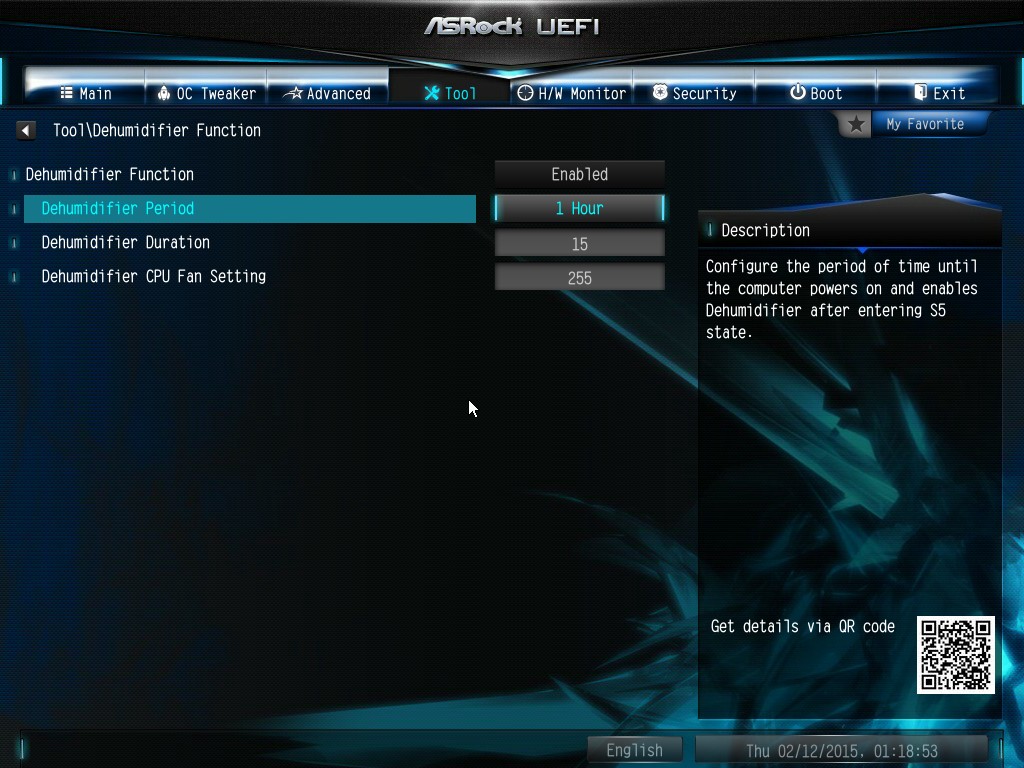
The Dehumidifier function now gets its own sub menu, allowing fans to spin for a fixed time after the machine is in S5:
The H/W Monitor tab is where the temperatures, fan speeds and voltage monitoring tools are all kept, and we have seen an effort by the other manufacturers to improve the fan control situation. ASRock now joins them with the FAN-Tastic tuning option, moving into a more interactive type of scenario. This extends the multi-point gradient options into something more clickable, similar to the ASUS implementation. For example, a user can put a fan into one of five modes or customize the profile:
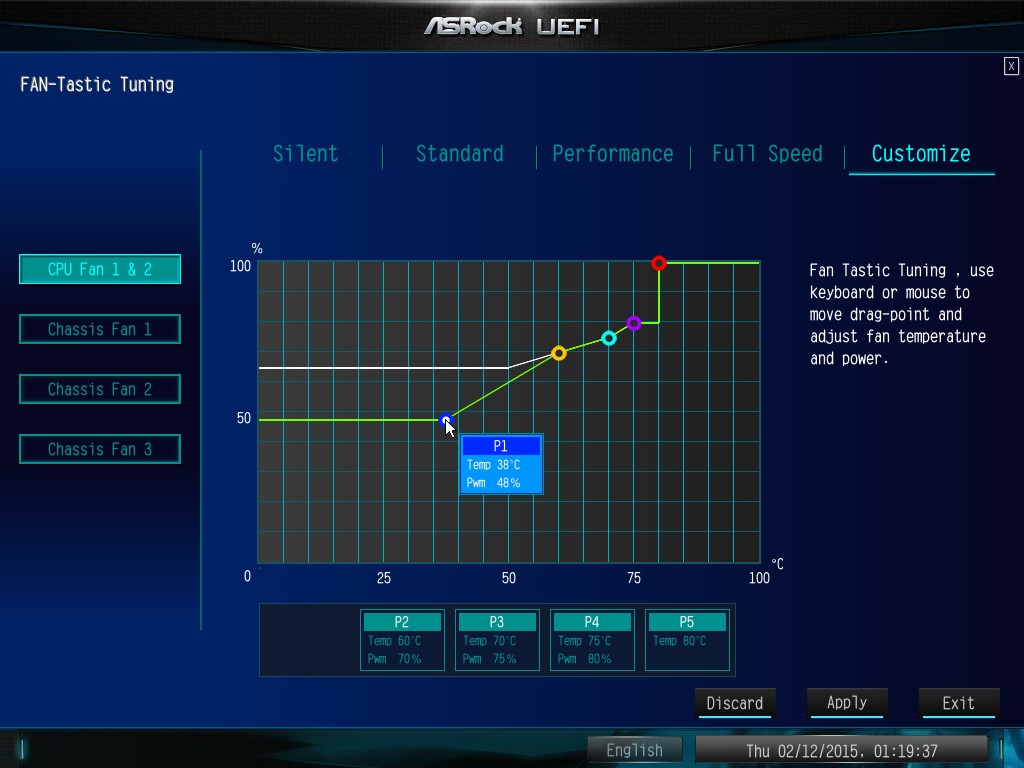
Rather than using the interface, users can do it the older way:
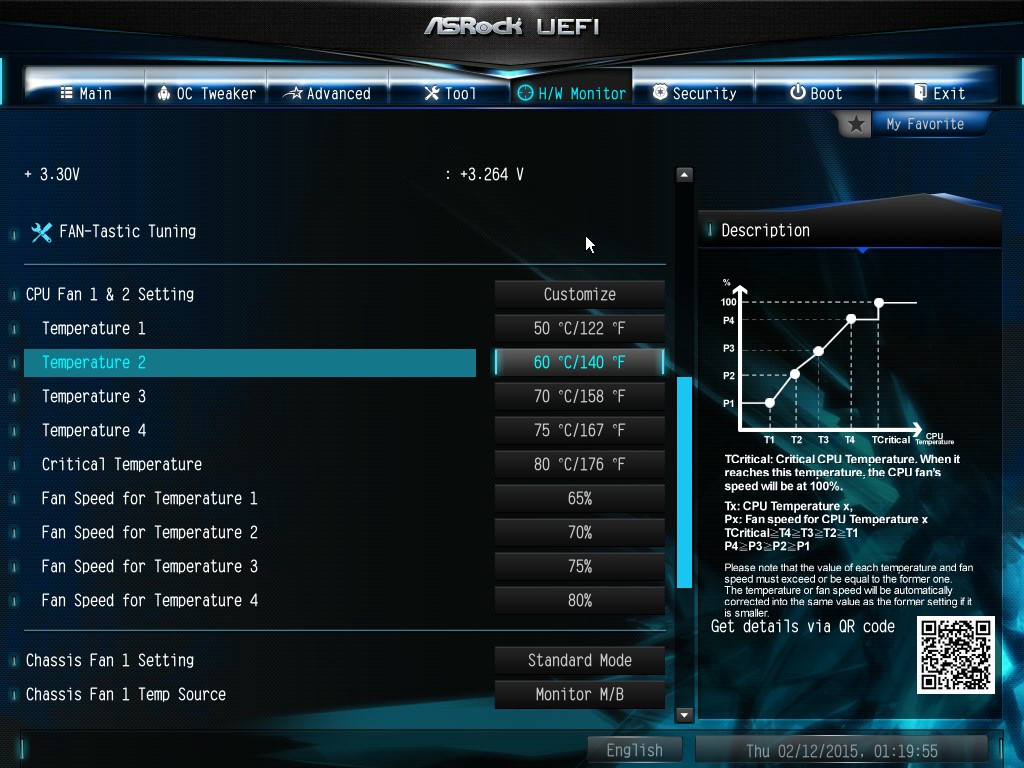
There is also an option to select which temperature sensor is being read from to make these adjustments.
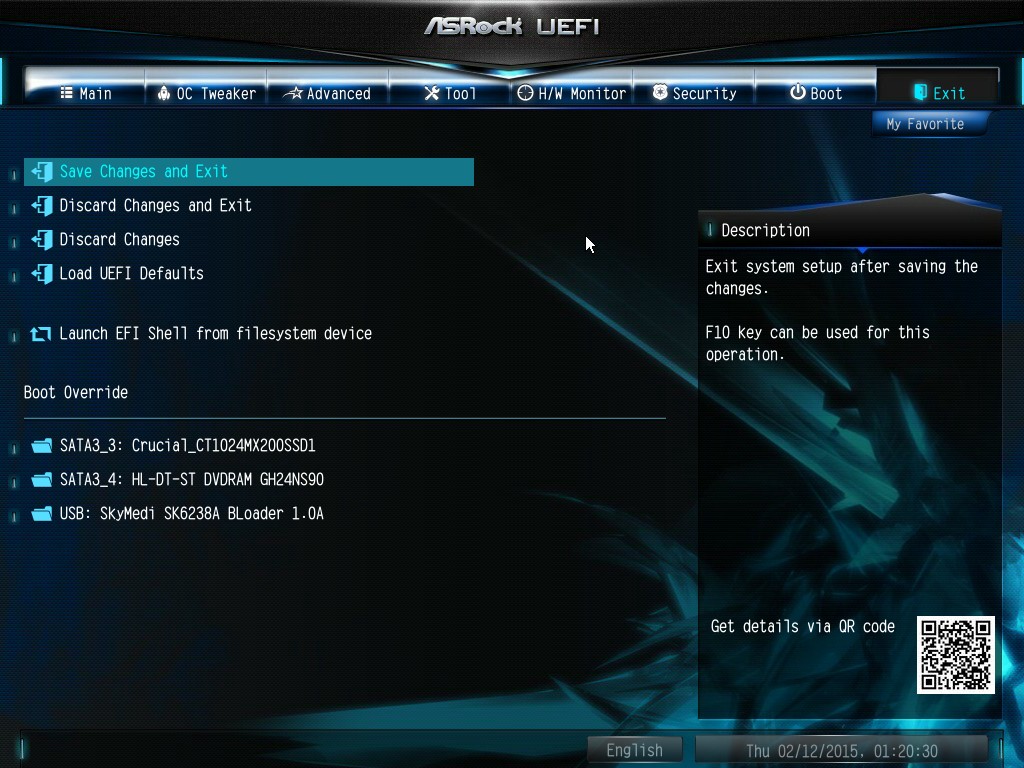
The rest of the BIOS deals with security, boot order and fast boot options. In the Save and Exit menu we do get options for Boot Override:


58 Comments
View All Comments
wyewye - Friday, March 13, 2015 - link
"this system is just a confused jumble of parts slapped together"This is the best conclusion for this mobo.
I think they hope marketing/sales guys will be able to bamboozle dummies to sell this as a 18 port raid server mobo. Anyone who spends 600$ on a high-end mobo without reading a review, deserves whats coming to them.
swaaye - Wednesday, March 11, 2015 - link
That chipset fan is cheesy. They most definitely could have come up with a better cooling solution.Hairs_ - Wednesday, March 11, 2015 - link
As pointed out above, this board doesn't answer a single question any user is asking, and it doesn't fulfill any logical useage case.I'm struggling to see why it was reviewed other than the possible reason "reviewer only wants to review weird expensive stuff". Getting in a board whose supposed only reason to exist is the number of storage ports, then not yet the storage, and say " in sure it's the same as the one I reviewed a few years ago " is... Troubling. What was the point of getting it in for review at all??
ClockHound - Wednesday, March 11, 2015 - link
What's the point?It's the new Anandtech, where the point is clicks! Catchy headlines with dubious content, it's how Purch is improving a once great review site. Thanks, Purch!
ap90033 - Friday, March 13, 2015 - link
I think you may be on to something! Sad to see..Stylex - Wednesday, March 11, 2015 - link
I don't understand how motherboards still have usb2 ports. Did it seriously take this long for it to transition from usb1.1 to usb2?DanNeely - Wednesday, March 11, 2015 - link
At the USB1.1-2.0 transition time, Intel chipsets had at most 6 ports; and since the new standard didn't need any more IO pins so they could cut over all at once. Not needing any more IO pins is important because it's been the the limiting factor for chipset cost for a number of years; with the die size being determined by the number of output pins added.The bottleneck for USB3 has been the chipsets. Pre-IVB they had no USB3. IVB added support for 4 ports, haswell bumped it to 6, the 9x series chipsets that were supported to launch with broadwell were essentially unchanged from the previous model. As a result, mobo makers who wanted to add more USB3 have had to spend extra money on 3rd party chips to do so. Initially it was on USB3 controllers which generally ate a PCIe lane for every pair of ports added. More recent designs are using 4 port USB hub chips; which give better bang for the buck but still drive prices up.
When skylake launches later this year, the situation should improve; its higher end versions will offer up to 10 ports. That might be enough ports to make all USB3 configurations possible in the mid range without either using a very small total number of ports or driving the board price up with extra controller chips. High end boards will probably still have some ports attached to a controller though, because Intel's expanding it's use of flexible IO ports and native USB3 will be competing with PCIe storage for IO pins. In both cases though, I suspect a number of boards will also expose the 4 remaining 2.0 ports; probably 1 internal header and 2 external ports. That won't be just a case of 'gotta use them all'; older OSes (eg win7) without native support for USB3 are easier to install if you've got a few 2.0 ports available; and there will be residual demand for 2.0 headers from people with older cases or internal card readers.
The situation is similar with AMD chipsets. But due to their being only able to compete in the value segment of the market, they're behind Intel; topping out at 4 native USB3 ports.
Stylex - Friday, March 13, 2015 - link
Ah, the pin count makes a lot of sense, thanks for that insight!But still, how much more could it possibly drive up the price to use a third party controller, $5-10? I'd pay that for all usb3, especially on a board like this one.
DanNeely - Sunday, March 15, 2015 - link
Estimates I've seen over the last few years put a 2 port USB3-PCIe controller as adding $10 to the retail price of a board; a 4 port USB3 hub chip added $5. The caveats are that hubs only add ports not total bandwidth; which is fine if you're only interested in being able to plug a USB3 device into any port but use sufficiently few of them that sticking multiple high speed devices on the same hub isn't a problem. Controllers don't have that problem; but do need PCIe lanes. Those tend to be in short supply on intels 8x/9x chipsets. Using a 4-8 lane PLX on the chipset relieves that pressure somewhat but is another $10 or $20 to the board price. The situation there will be better for skylake due to the 100 series chipets having 28 high speed IO lanes instead of only 18; but that's partially counter balanced by m2/SataExpress connections needing several lanes each.The lack of native 3.1 support means that the next generation of mobos will probably go the controller route; not hubs to bump up the port count. With Intel rarely doing any major updates on the Tock versions of the chipset, it will probably be at least 2017 before external USB3 controllers mostly go way.
darkfalz - Thursday, March 12, 2015 - link
You have a keyboard, mouse or gamepad that requires 100 MB/sec bandwidth, do you?